Instead of letting your recipients unsubscribe from all future sendouts, subscriptions adds the option to fine tune which types of emails they want to receive in the future. This increases your service to your audience and reduces full unsubscribes.
This document describes subscriptions and helps you get started.
Description
Subscriptions mainly consists of a list of categories, one for each type of communication you are sending.
Lets say you have these categories:
- Newsletters
- Event invitations
- Special offers
This means every time you send an email, you need to set which subscription category it belongs to. When the email is sent, eMarketeer will skip any recipient who has unsubscribed from this specific category. The same recipient may still receive emails from other subscription categories.
The subscription categories will be visible on the subscription center (public unsubscribe page).
Note: You can set an email to have no subscription category. In this case only total unsubscriptions will be rejected.
Setting up subscription categories (Admin privileges required)
First of all, if you do not have set up any subscriptions eMarketeer will work as usual, only offering total unsubscription to the recipients.
To add subscriptions, head over to “Account” and find “Subscription and send outs”.
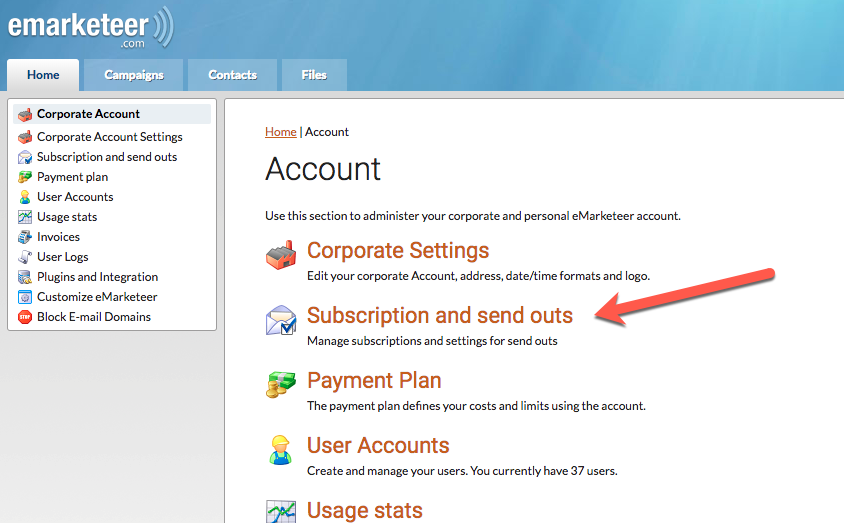
On this page you will find the subscription categories, create or manage existing ones.
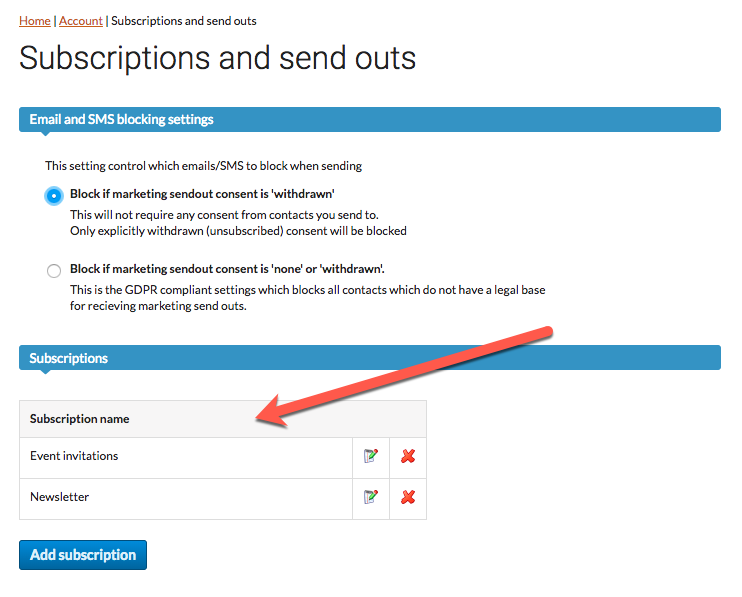
When you create subscriptions, think about the following.
- The name you provide will be visible to recipients, so make them short and clear.
- Keep the list short and do not be too specific. Generally choose a subscription for each type of send out you think your audience want to manage.
Once you have created the subscriptions they will available in eMarketeer and publicly.
Your contacts
Now that you have created a list of subscriptions it will be available on each contact card in eMarketeer.
All subscriptions will be ON for all contacts. Any new contact created will also have all subscriptions set to ON.
It’s up to the contacts to turn any subscription off the next time they go to the subscription center.
You can however use bulk update to set subscriptions to on or off for any selection.
Creating an email
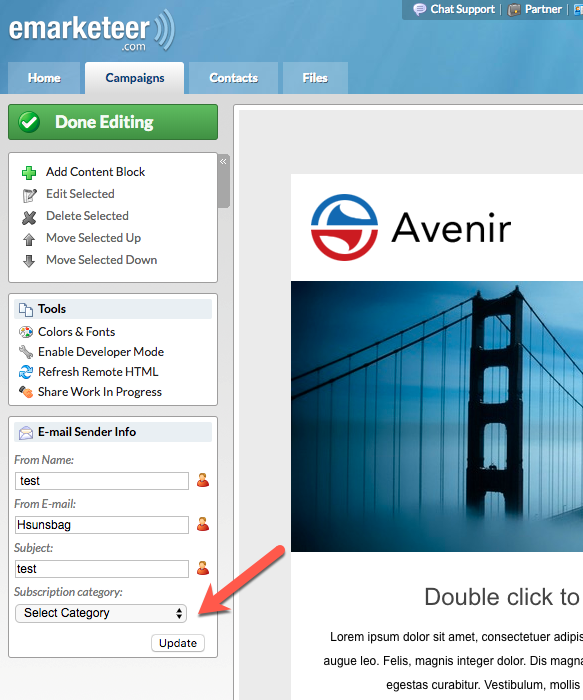
When creating a new email from a template, you will notice a new setting: the subscription droplist.
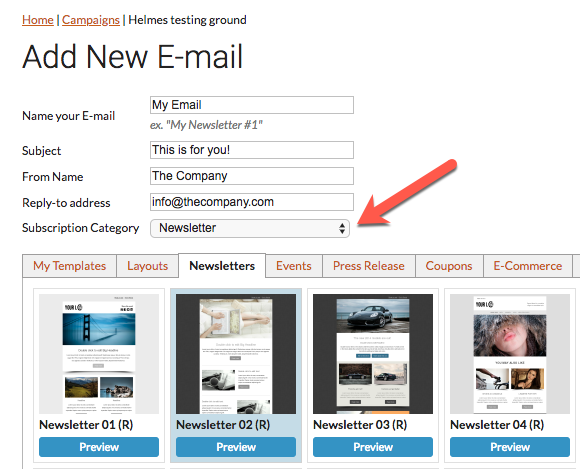
Select the subscription category which matches the type of email you are sending.
Note: From time to time you will send an email which is not the typical send out and does not match an existing subscription. In this case you can set the category to “none”. Just remember everyone who is not totally unsubscribed (legal basis = withdrawn) will get this email.
If you choose to copy an existing email, the new copy will get the same subscription as the original. It can however be changed again when editing the email.
Subscription center
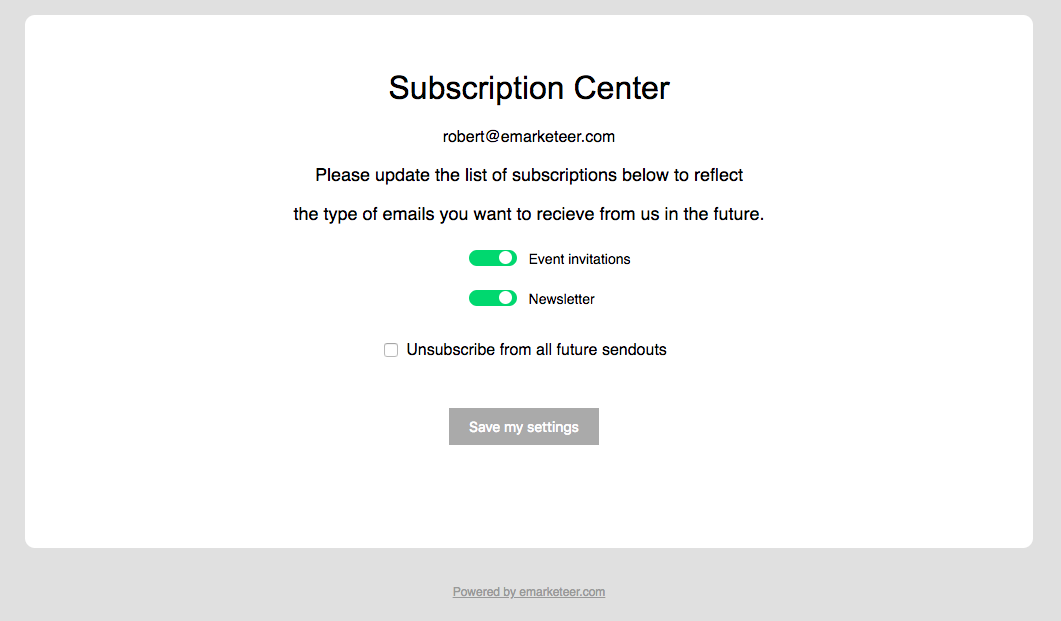
You do not have to change anything in your templates to get the new subscription center. It’s just a new name for the “unsubscribe page”. It will looks the same, just with added option to manage subscriptions. To unsubscribe fully, the recipient needs to check a checkbox to “Unsubscribe from all future sendouts” (which will withdraw the marketing consent and stop all emails).
Automations
You will also find new automations to set and unset subscriptions to be used on any component event.