In this article, you learn:
- Why you should use campaign fields
- How to set up campaign fields in your campaign
- How to add campaign fields to your campaign content
- Other quick tips for campaign fields
What are campaign fields?
With campaign fields, you can add custom information to your campaign. Think of information that you’d like to use throughout your campaign content. For example, information such as titles, event names, descriptions, images, dates, and so on. It’s up to you what fields you’d like to add.
Why should you use campaign fields?
Instead of having to type the same information in every single content piece, you can instead add campaign fields with that information to your content. This means that if you have to edit or update the information, you don’t have to do so in every component. You would just have to update the campaign field and all content that has that field is instantly updated as well. This is especially helpful when you copy a campaign since you only have to edit the campaign fields to have the whole campaign up-to-date within minutes.
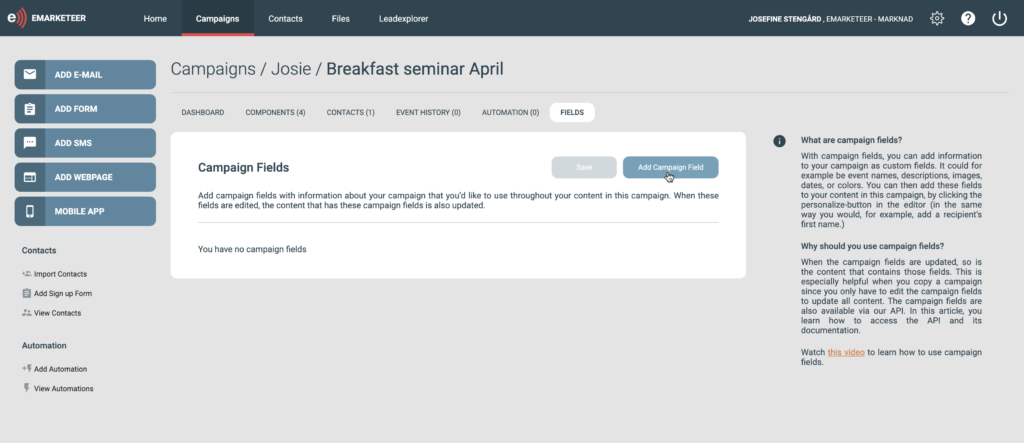
How to set up campaign fields
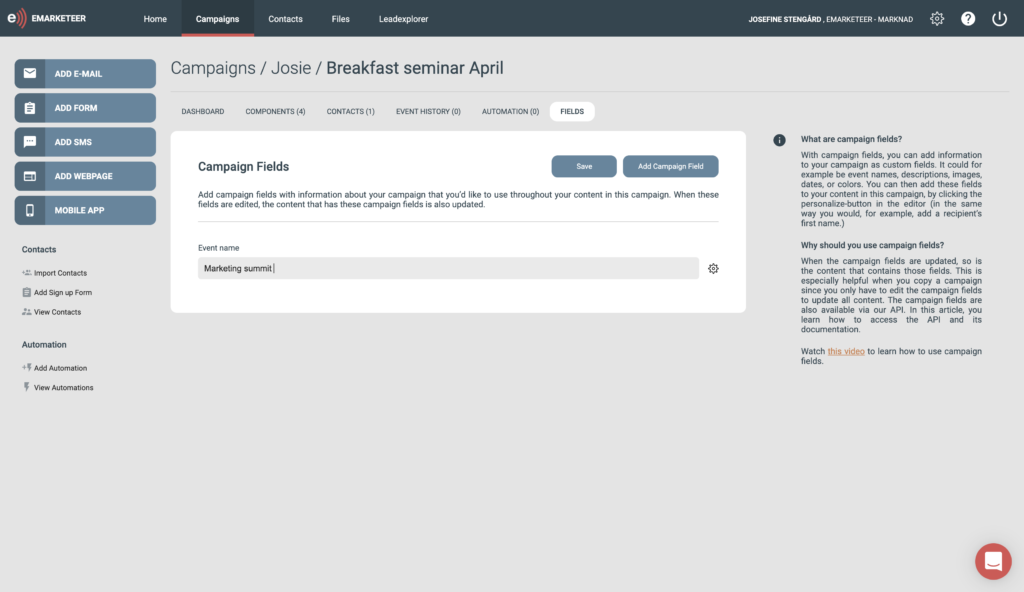
1. In your campaign, go to the tab called “fields” and click the button called “add campaign field.”
2. In the pop-up, name your field. Make sure that it clearly states what information this field contains so it’s easier for you. For example, event name. In the field called “description,” you can also choose to describe how and when you use this field to use as a reference for future edits of the campaign fields.
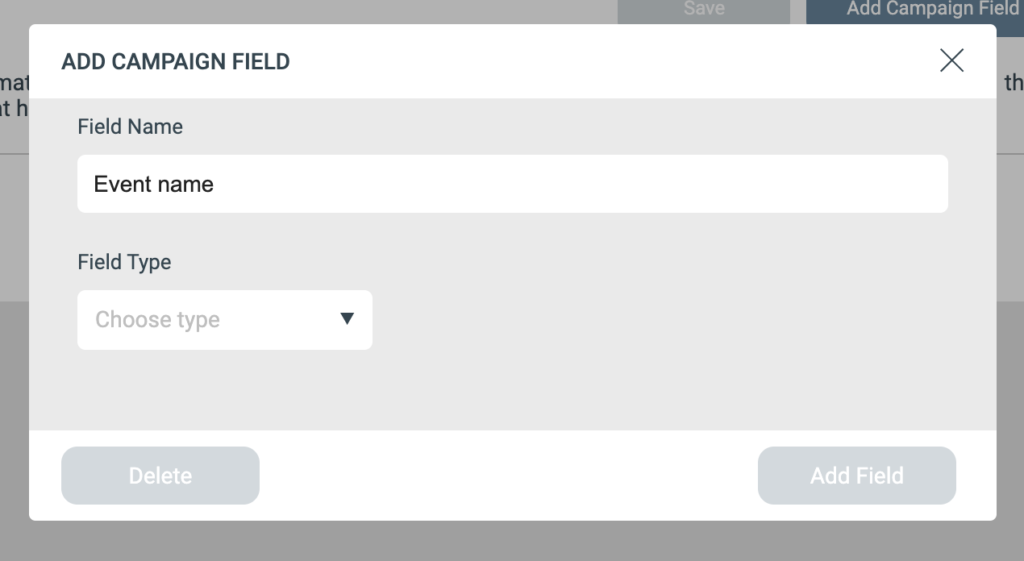
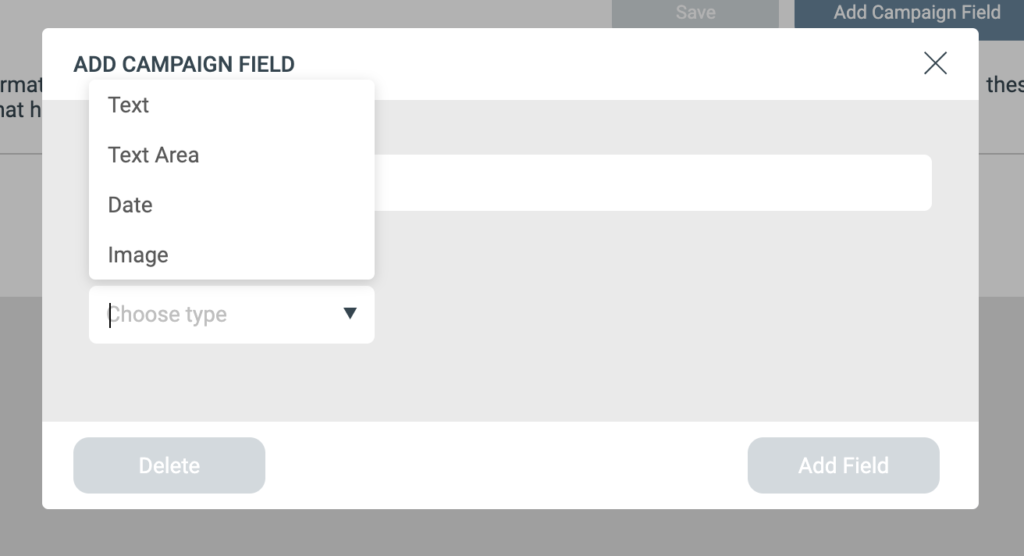
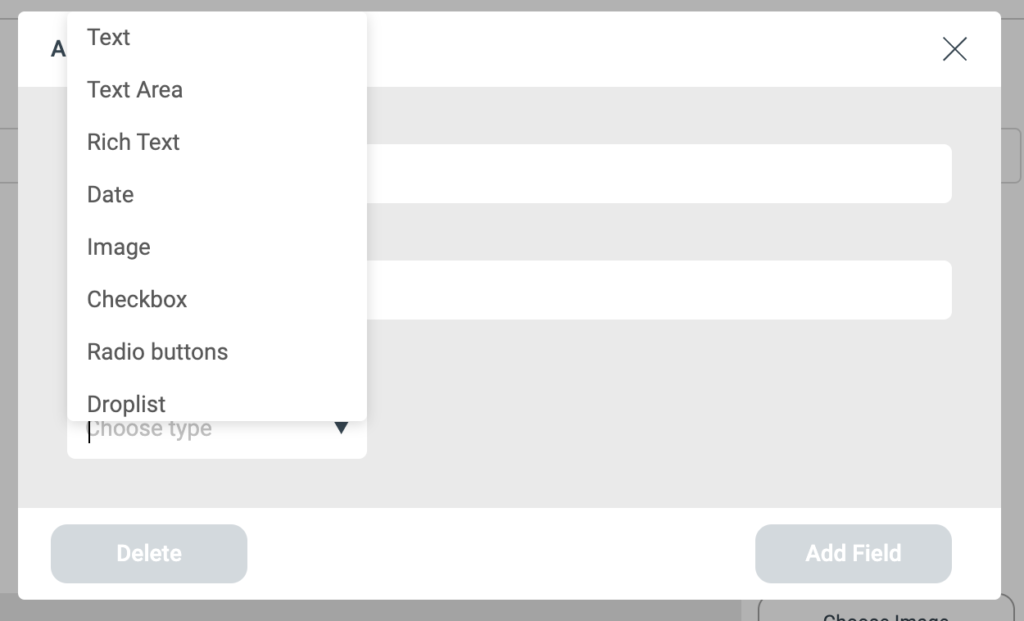
3. Choose what type of field this is, in other words, what type of information this field contains. You can choose from these types:
-
- Text: suitable for headlines or names.
- Text area: similar to the text type, but you have more room for text, so suitable for descriptions or summaries. (This field type also supports HTML)
- Date (including time if you’d like)
- Image. You can either add an image from your eMarketeer image library or grab an image link from, for example, your website (just make sure that the image link then starts with https).
- Rich text: For text that you’d like to customize with bold, italics, hyperlinks, etc.
- Checkbox: The checkbox is a way to easily set if the campaign content should display certain information at all. Let’s use events as an example. You have two differents events with one campaign for each event. For one of the events, you need to inform the guests about parking. You could then use a checkbox as a campaign field; when the check box is checked, the information about parking is added to your content. If it’s not checked, it’s not added.
- Radio buttons: Works a bit similar to checkbox, but here you have more options on what information to use in your content. Let’s stick with the events as an example. You have multiple different events at different locations. You could add radio buttons for each location, for example, Copenhagen and Stockholm. For the Copenhagen event, you click the radio button for Copenhagen, and the location is automatically added as Copenhagen in your content.
- Droplist: Another way to add pick more options of information and here you can also choose multiple options. An example could be a list of speakers at your event. Use the drop list to add the speakers for your particular event and the speakers are added to your content.
4. When you’ve chosen the type, a field will appear. Type the applicable information to that field.
Repeat these steps for any number campaign fields you’d like. Don’t forget to click “save.” If you need to edit or delete the campaign field, just click the cog wheel.
How to add campaign fields to your content
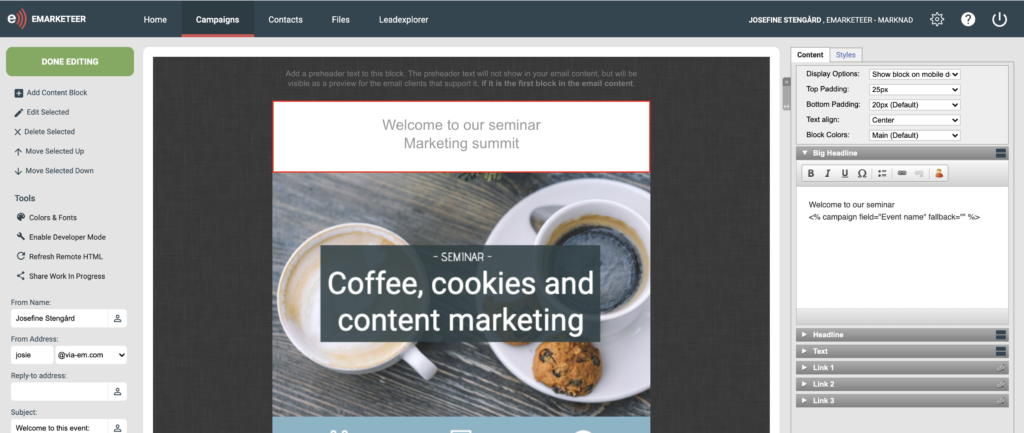
You add a campaign field, in the same way as you would insert your recipient’s first name.
1. Go to your content editor, in this example, we use an email. Click to edit the text block where you’d like to add your campaign field.

2. Click the personalize-icon.

3. In the pop-up window, you see a list of the fields you have on your contact card, but also a list of the campaign fields you set up. (This is why it’s important the name your fields properly so you know which field to pick.)
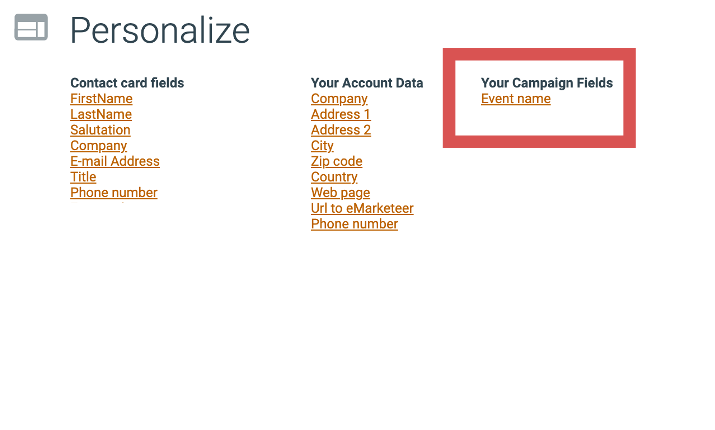
4. Choose the campaign field, click save and now you notice that it’s added to your content.
How to add campaign field as an image or to a form.
Currently, there’s no personalize-button for image blocks or the form editor, but you can still add your campaign field by going to any text block, copy the campaign field link and add it to your form or as your image URL in the image block.
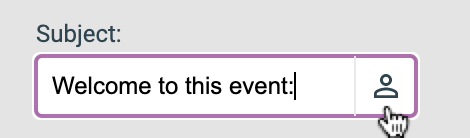
Use campaign fields in your sender information
You can also use a campaign field in, for example, the subject line. Just click the personalize-icon right next to your subject and choose your campaign field.