Creating your first Form for an event or newsletter signup is quite easy to do in eMarketeer and this guide will show you how to do it.
1. Starting from the Campaign page where you wish to create the Form, click the [Add Form] button.
- If you first need to create the Campaign, then refer to the following article: How to Create a New Campaign
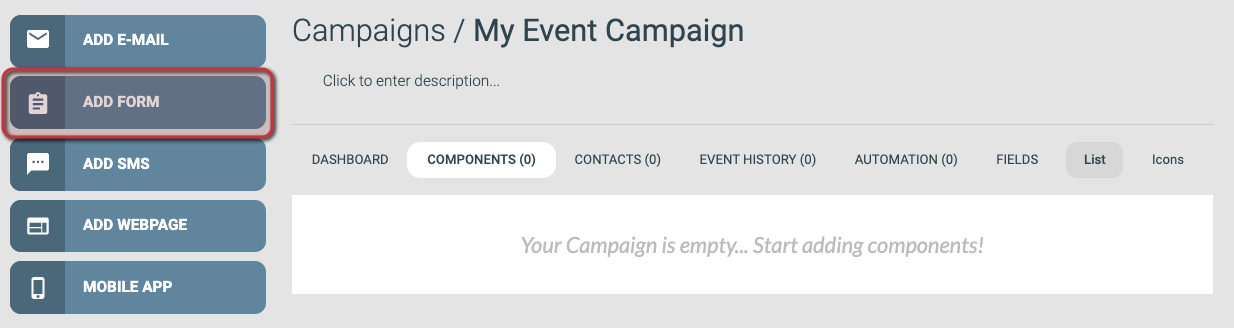
The [Add Form] Button
2. Filling the settings fields, choosing a Template to use, and Creating the Form Component.
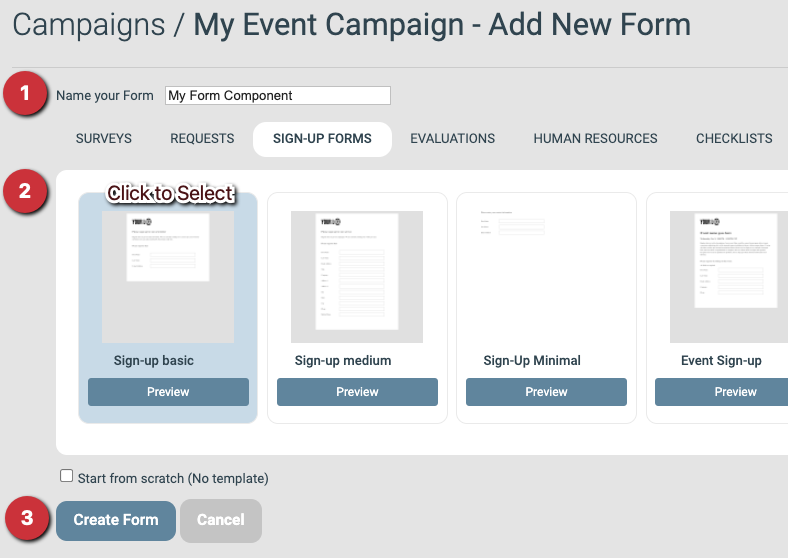
Form Settings
Settings
- Name your Form:
Give your Form a unique name so that you can find it later. It is recommended that the name also describes the purpose of the Form component in the context of the Campaign (eg. “Registration” if the Form component is a registration form). This name is something only you will see and will not be shown to the visitors of the Form.
Template
Select a Template from one of the tabs to use as a base for the design of the Form.
For this guide, I’ve chosen the Template called Sign-up Basic found on the [Sign-Up Forms] tab.
If your company has custom Templates saved on the Account then they will be shown on the tab called [My Templates].
Create Form Component
After filling out the settings fields and selecting a Template to use you can click the [Create Form] button to create the Component.
3. The Form Editor
After clicking the [Create Form] button in step 2, the Email will be created and the Form editor will open so that you can update the Content of your new component.
The page will show a menu on the left where you can add new Form Items, access some Tools, and change the settings.
The rest of the page shows the current Form Content, which at creation is imported from the Template that you chose to use.
The content is made up of Content Blocks called Form Items that can be updated individually as shown in the following steps.
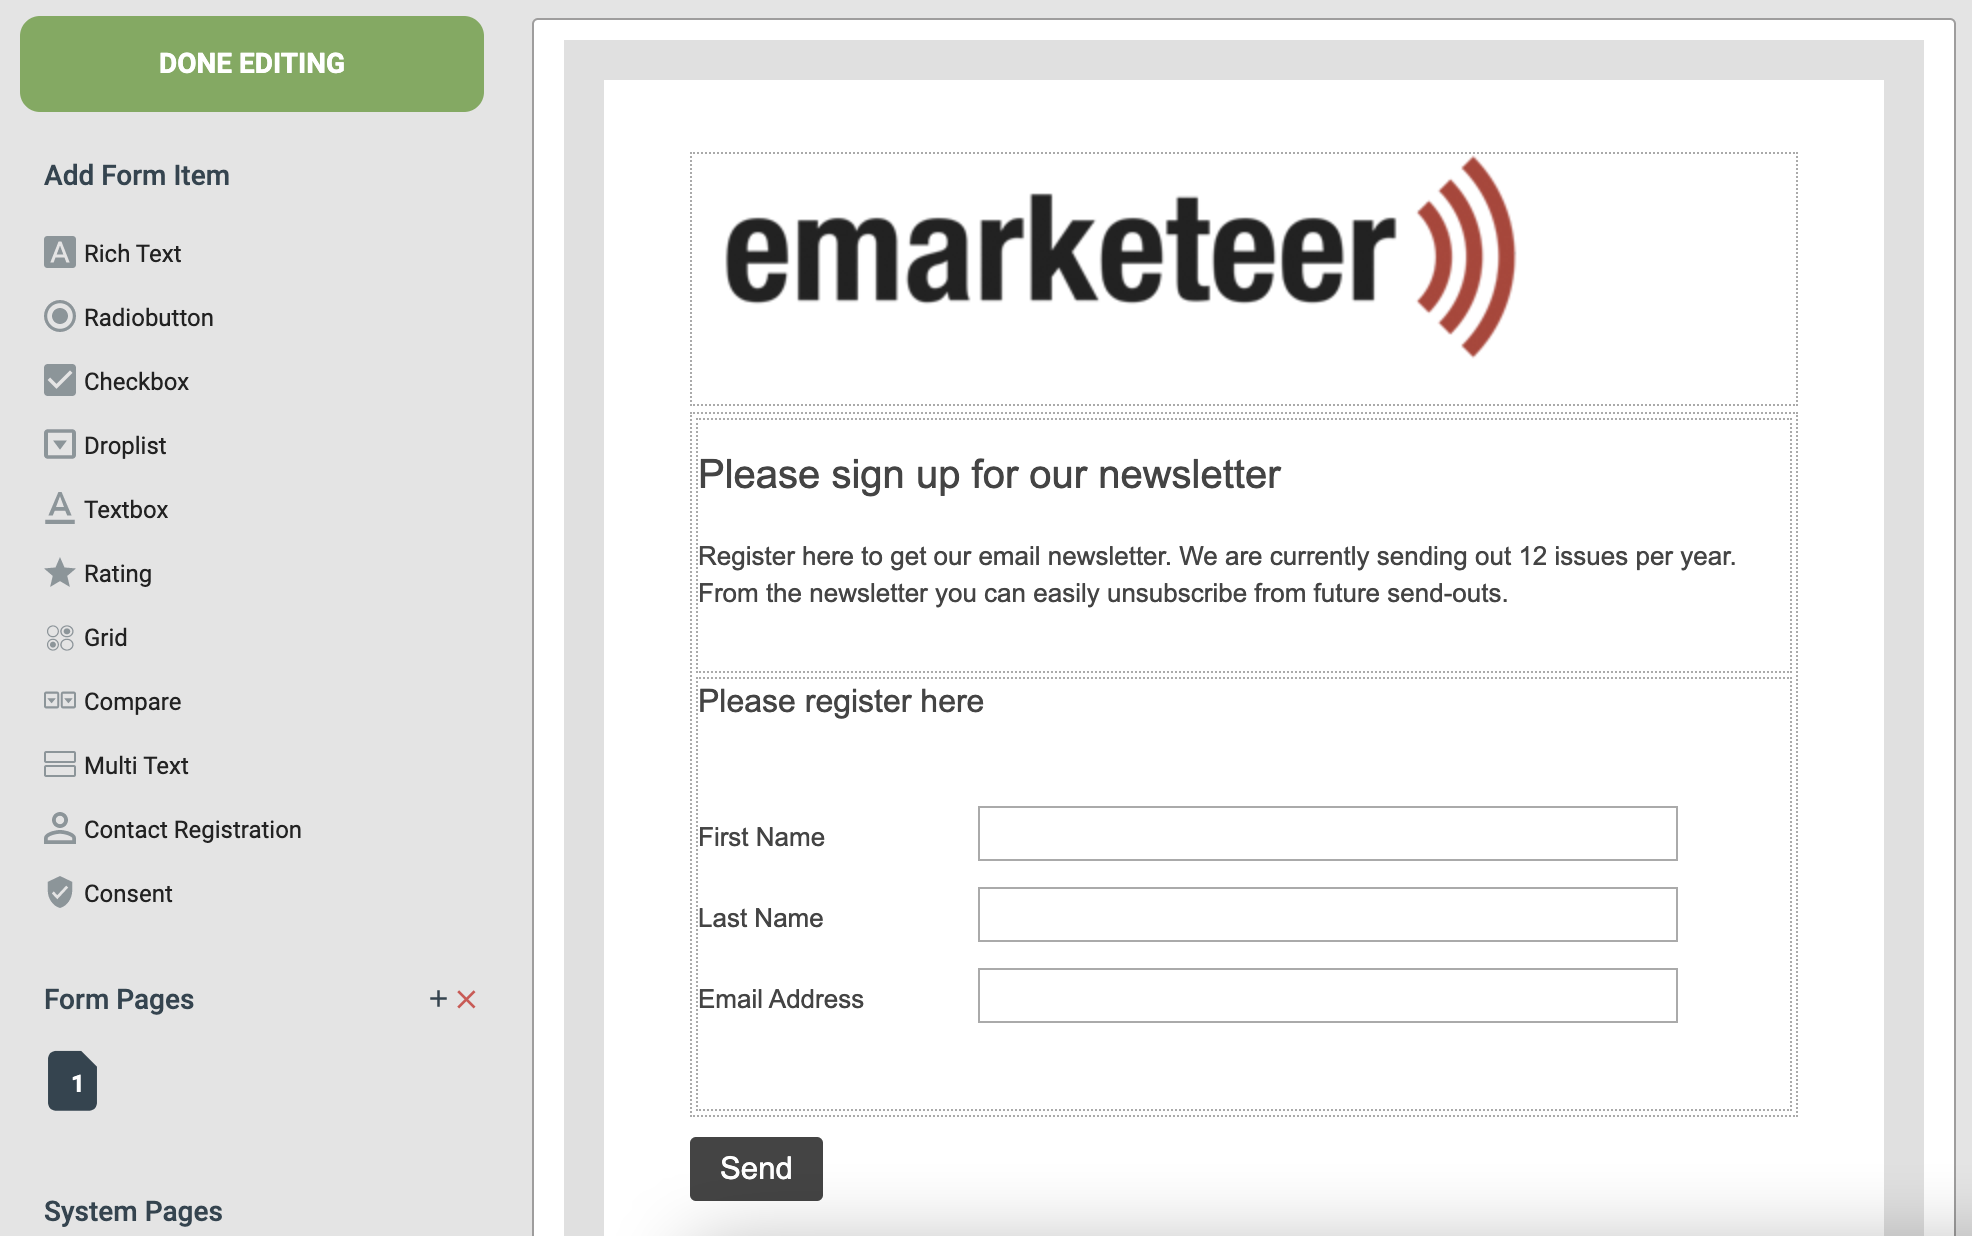
The Form editing view
4. Changing the introduction text
The first Form Item in most templates will be a Rich Text block where you can add an explanation of the Form or add any relevant information such as dates, times and locations relevant to an Event.
To edit any Form Item in the content you can either click the [Edit] button of the block, or double-click the block itself, and a popup where you can change the questions, answers, or in this case the text.
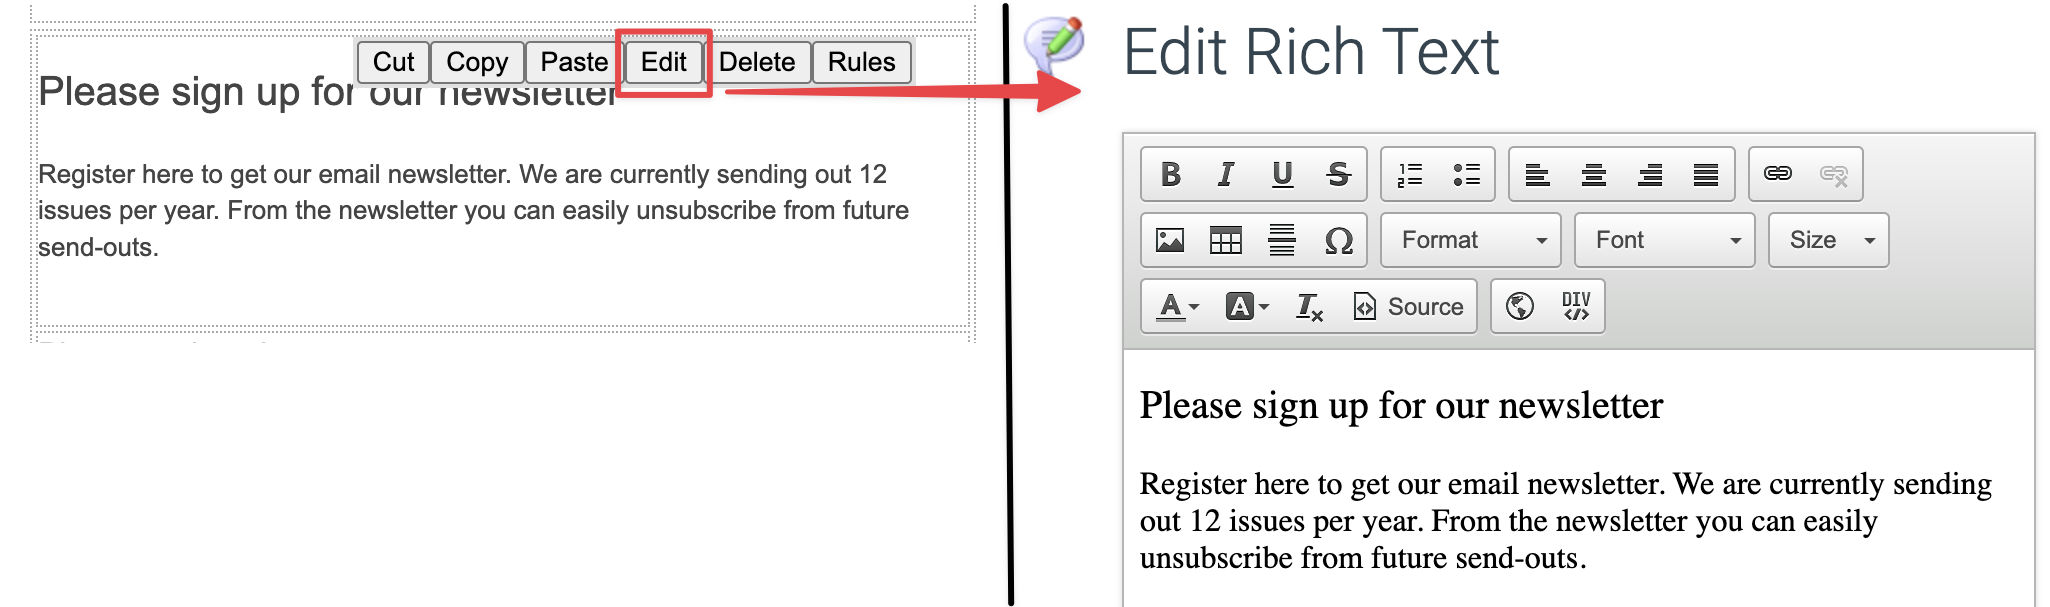
Editing a Rich Text block
5. Adjusting the Registration block
The Registration block is the most important block in any Form that isn’t set up specifically to collect anonymous answers. This Form Item is not only able to save the visitor’s contact information in their form submission, but also takes the information and matches it against your eMarketeer contact database to either match the submission to the visitor’s contact card and update it with any new information, or to create a new contact if they don’t have an existing contact card, among other things that allow for more advanced uses not covered in this article.

The Registration Form Item options
The options for what you can ask for in the Contact Registration block is directly linked to the fields on a Contact Card and when editing this Form Item you can select which ones to ask for and which ones should be required to answer to submit an answer to the Form. Note that this Form Item always asks for the visitor’s Email Address, this is because it’s a required field on on your contacts’ contact cards.
6. The most commonly used Form Items
When it comes to what Form Items to use we will only focus on the basic types in this article to get you started.
- Radiobutton: A question type with multiple pre-defined answers where the visitor only can choose one of the options.
- Checkbox: A question type with multiple pre-defined answers where the visitor can choose multiple of the options.
- Textbox: A question where the visitor can write any text answer they want. Preferable to use when you want longer answers.
- Multi Text: A Form Item where you can have several short questions where the visitor can write any text answer they want. Preferable when the answers are intended to be short.
- Consent: Creates a checkbox with a text of your choosing which automatically updates the Consent setting on the visitors contact card in eMarketeer. Useful for when you need to collect explicit consent to store a visitors contact information.
You can find the menu to add these question types in the Add Form Item menu found in the top-left of the Form editor.
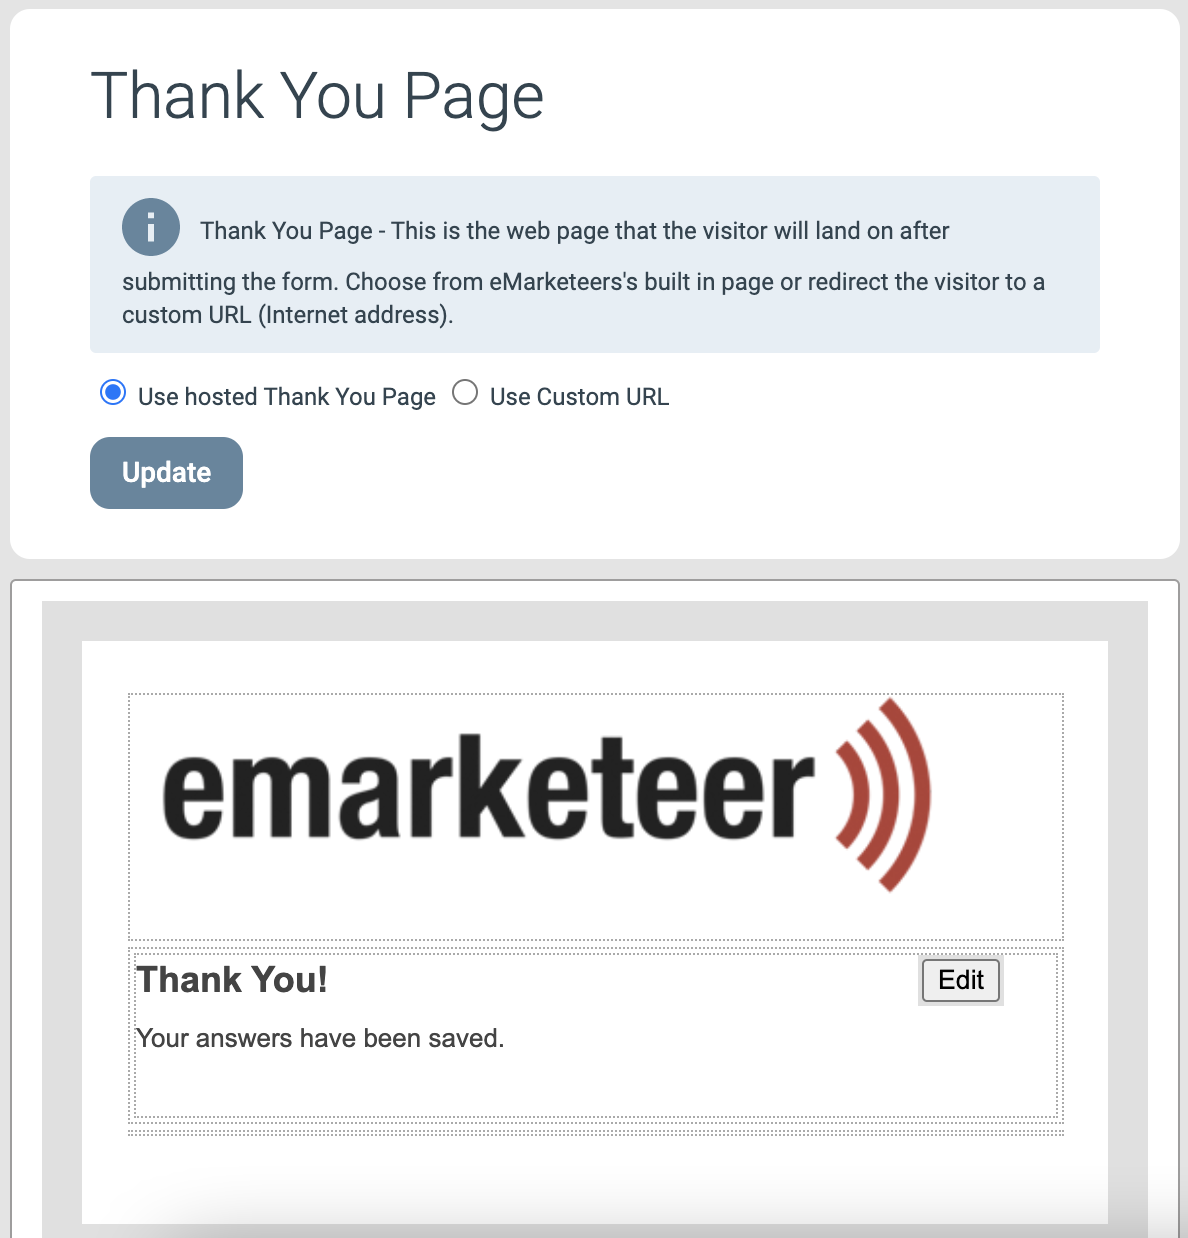
7. Setting up the Thank You page
After a visitor has submitted an answer they will be redirected to the Thank You page to show that their answer has been saved. The default Thank You page only consists of a text block, which you can edit to fit your Form and include any additional information relevant to the visitors that have reached this page. To set up your Form’s Thank You page you click on the [Thank You Page] button in the menu on the left side of the editor.
The Thank You page options
The first option you have in the Thank You page settings is the option to either use a Hosted Thank You page or a Custom URL. The hosted page is the default and is the simpler option where you simply change the text to be shown. The custom URL option is for when you have a specific Thank You page you want to bring the visitors to, such as a webpage on your website.
The second option is to edit the text that is shown to the visitor, which you can do by clicking the [Edit] button as shown in the image above.
8. Using a Confirmation page (optional)
We generally do not recommend that you use this feature unless it is needed, but for some longer surveys you may want to allow the visitor to review their answers before submitting them. The Confirmation Page shows the visitor their answers and gives them the option to either [Edit] their answers or [Finish] and submit their answer.
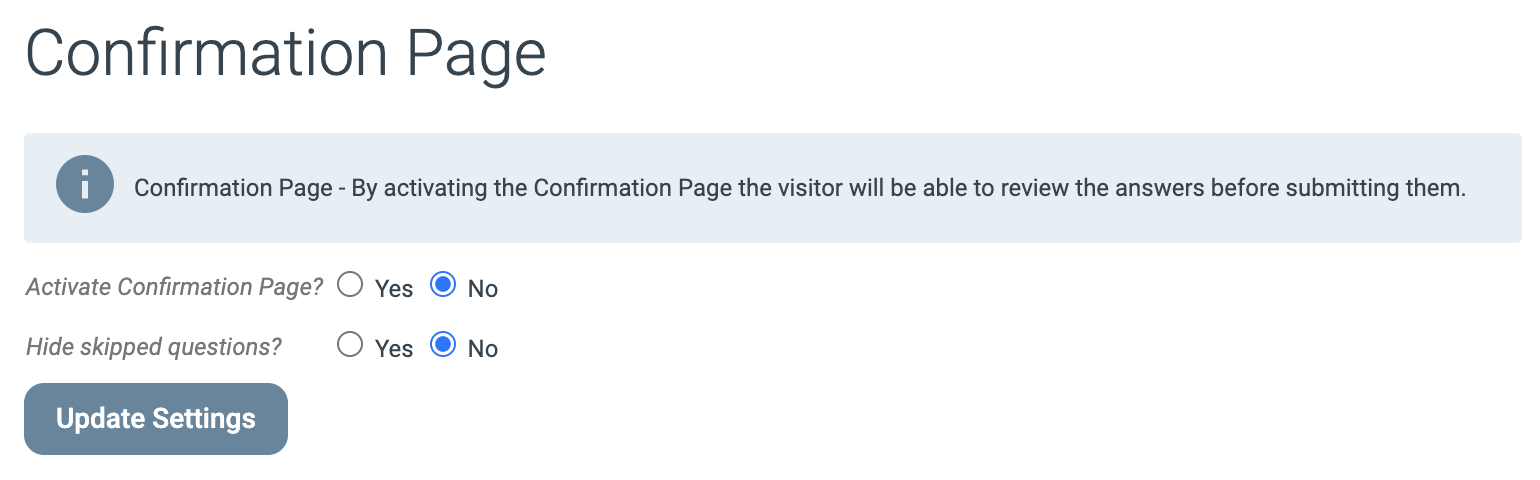
The Confirmation Page options
When active, the confirmation page will be shown after the visitor has proceeded from the Form to submit their answer, at which point the visitor has to click the previously mentioned [Finish] button to confirm their submission, be directed to the Form’s Thank You page, and be sent a Confirmation Email (if used for the Form).
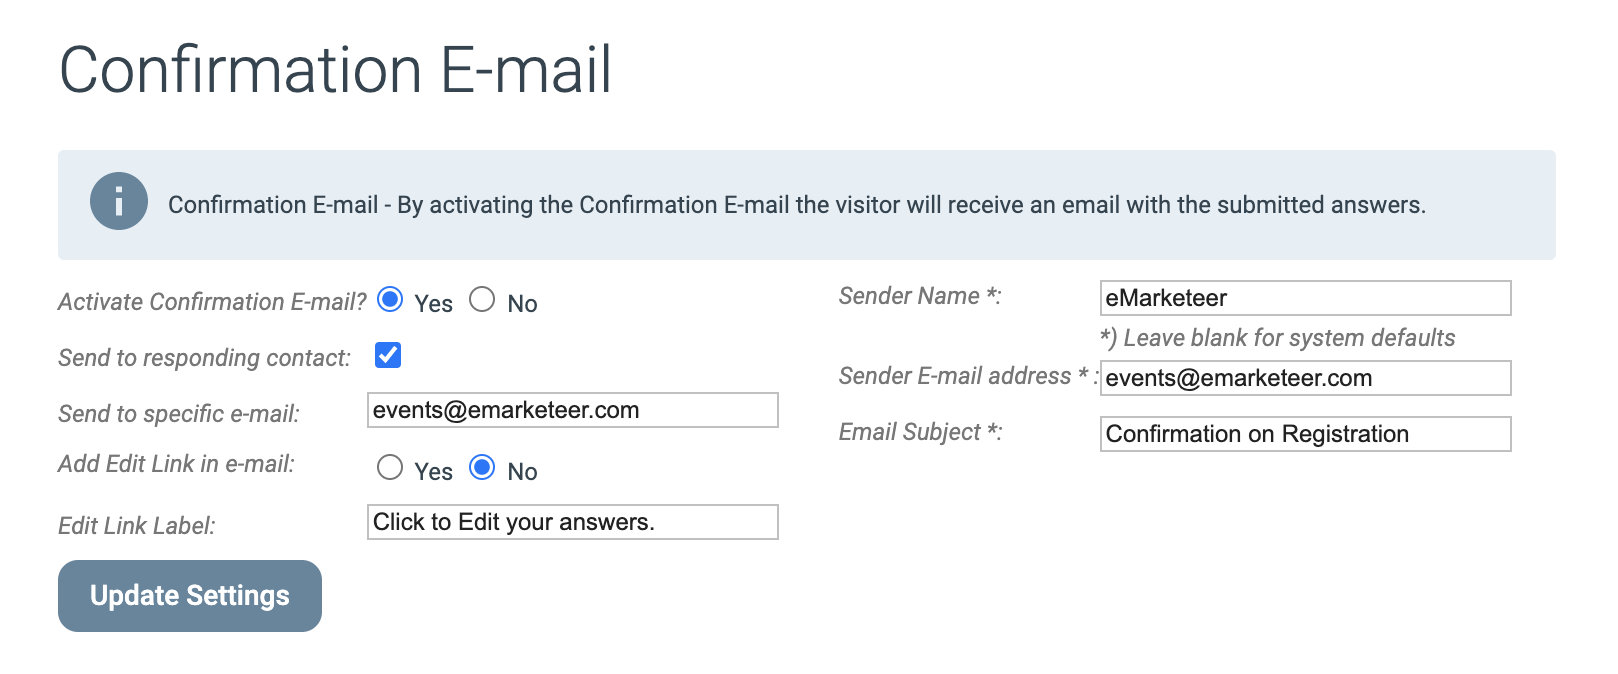
9. Configuring a Confirmation Email (optional)
The Confirmation Email settings allow you to send a copy of form submissions that come in to a specified email address and send a copy of the answers to the person that submitted them.
Confirmation Email options
There are several options and fields to think about when you want to activate confirmation emails for your Form, an example of which can be seen in the image above.
- Activate Confirmation Email: Activate the feature for this Form.
- Send to responding contact: If the visitor should get a confirmation email with their answer.
- Send to specific e-mail: If you want to send a copy of all submitted answers to yourself or another colleague.
- Add Edit Link in e-mail: If the visitor should have the option to go back and edit their answers at a later date via the email. Not recommended in most cases.
- Sender Name: The name of the sender of the Confirmation email as shown in the recipient’s email client.
- Sender E-mail address: The address of the sender or the confirmation email as shown in the recipient’s email client.
- Email Subject: The text that will be shown in the subject line for the email in the recipient’s email client.
10. Publishing your Form
When you are done creating your Form you have a couple of options for sharing it to your contacts or visitors.

The Publishing page for a Form
- Direct URL
This option provides you with a direct link to the Form which can for example be shared with your colleagues, posted on social media, or linked to from your website. When this option is clicked you will see a popup that contains the link to the Form which you have to copy directly from the field to wherever you want to send it. Note that you cannot visit this link and then share the URL of the Form page from your web browser, this is because each visitor of a Form gets a unique URL that is intended to only be used by that specific visitor, so copy the Direct URL directly from the popup window. - Website Integration
This option provides you with the HTML code and scripts to integrate the Form to your own website. Our support cannot always help with issues you may encounter when using this option since it’s implemented externally from eMarketeer so we do not recommend this option if you do not have experience with this type of integration. - E-mail
You can link to a Form in an Email via the Email editor. This article has a section that shows you how: [Creating your first Email]