Creating your first Webpage as an event landing page or news article with a great design is easy to do in eMarketeer and this guide will show you how to do it.
1. Starting from the Campaign page, click the [Add Webpage] button.
- If you first need to create the Campaign, then refer to the following article: How to Create a New Campaign
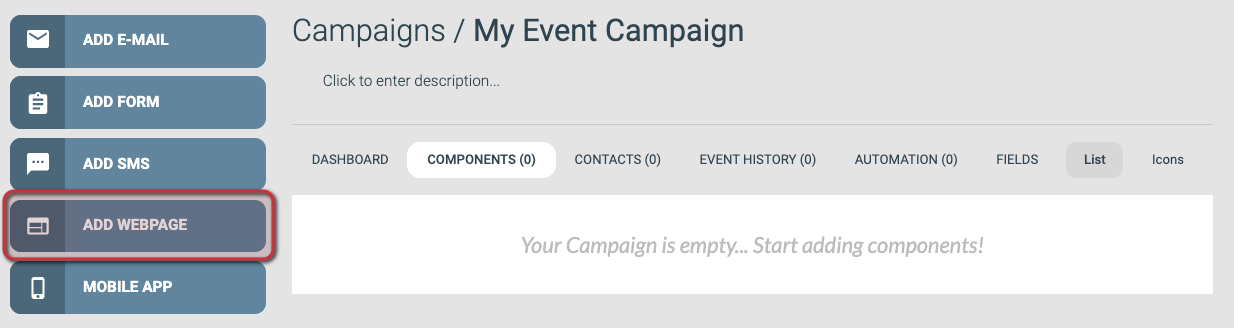
The [Add Webpage] button
2. Filling the settings fields, choosing a Template to use, and Creating the Webpage Component.
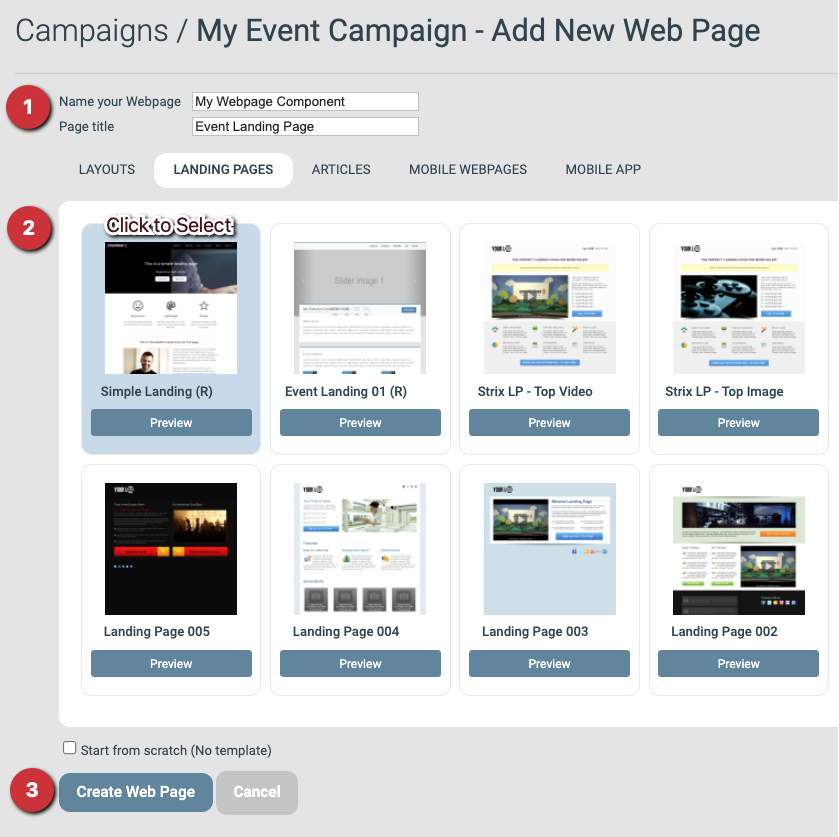
Webpage Settings
Settings
- Name your Webpage:
Give your Webpage a unique name so that you can find it later. It is recommended that the name also describes the purpose of the Webpage component in the context of the Campaign. This name is something only you will see and will not be shown to the visitors.. - Page Title:
This will be the title of the Webpage that the visitors will see in their web browsers.
Template
Select a Template from one of the tabs to use as a base for the design of the Webpage.
For this guide, I’ve chosen the Template called Simple Landing (R) found on the [Landing Pages] tab.
If your company has custom Templates saved on the Account then they will be shown on the tab called [My Templates].
Create Webpage Component
After filling out the settings fields and selecting a Template to use you can click the [Create Web Page] button to create the Component.
3. The Webpage Editor
After clicking the [Create Web Page] button in step 2, the Webpage will be created and the editor will open so that you can update the Content of your new page.
The page will show a menu on the left where you can add new Content Blocks, access some Tools, and update the Webpage settings if you need to change something from step 2.
The rest of the page shows the current Webpage Content, which at creation is imported from the Template that you chose to use.
The content is made up of Content Blocks that can be updated individually as shown in the following steps.
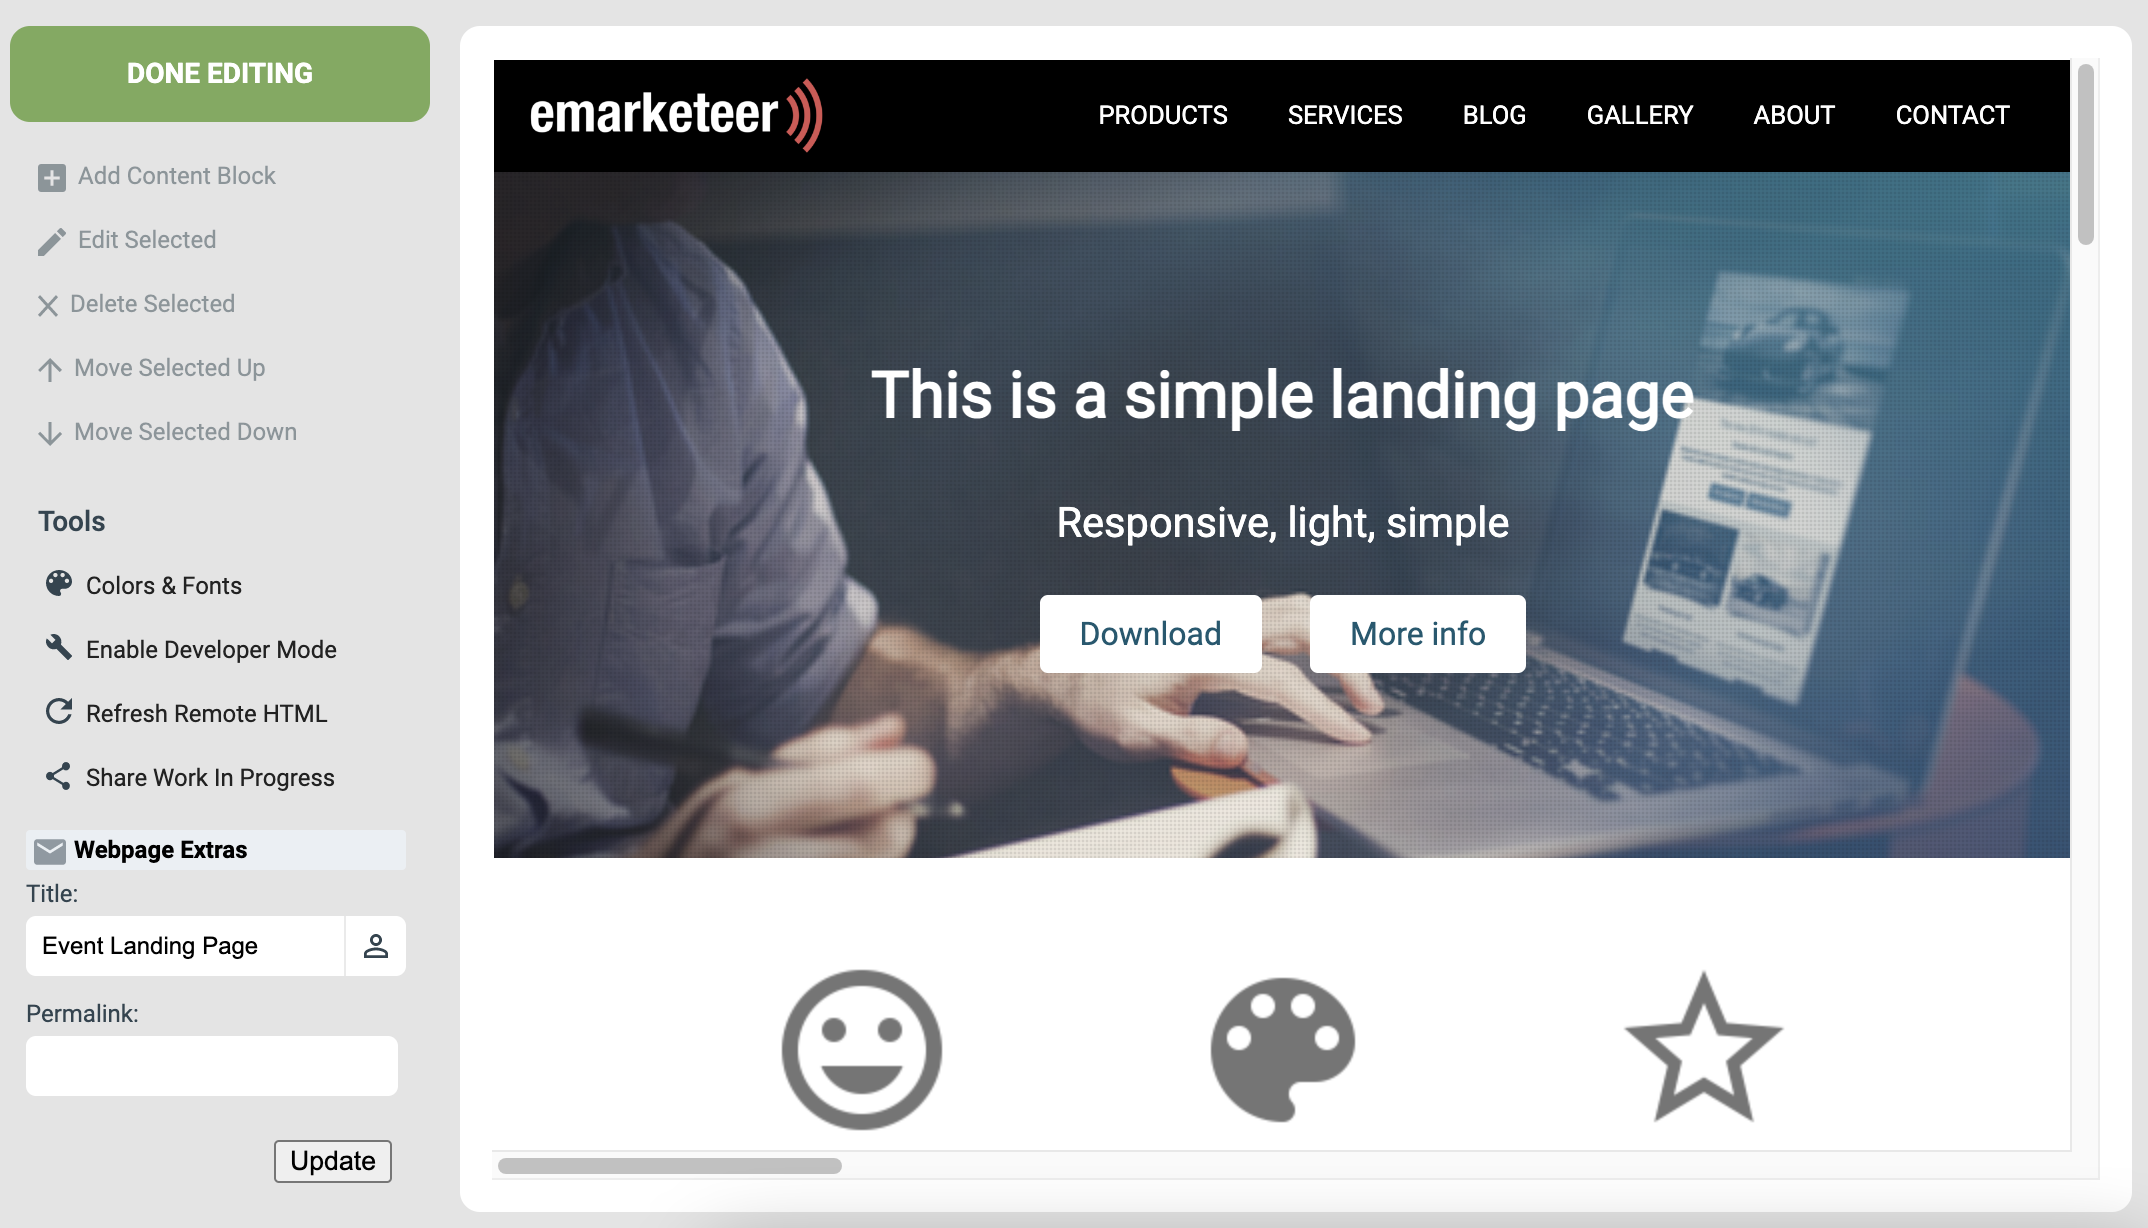
The Webpage Editing view
4. Editing a Webpage Content Block
Each Content Block on the page is made up of a few different parts which you can update by clicking the Edit button for a Content Block as shown in the image below.
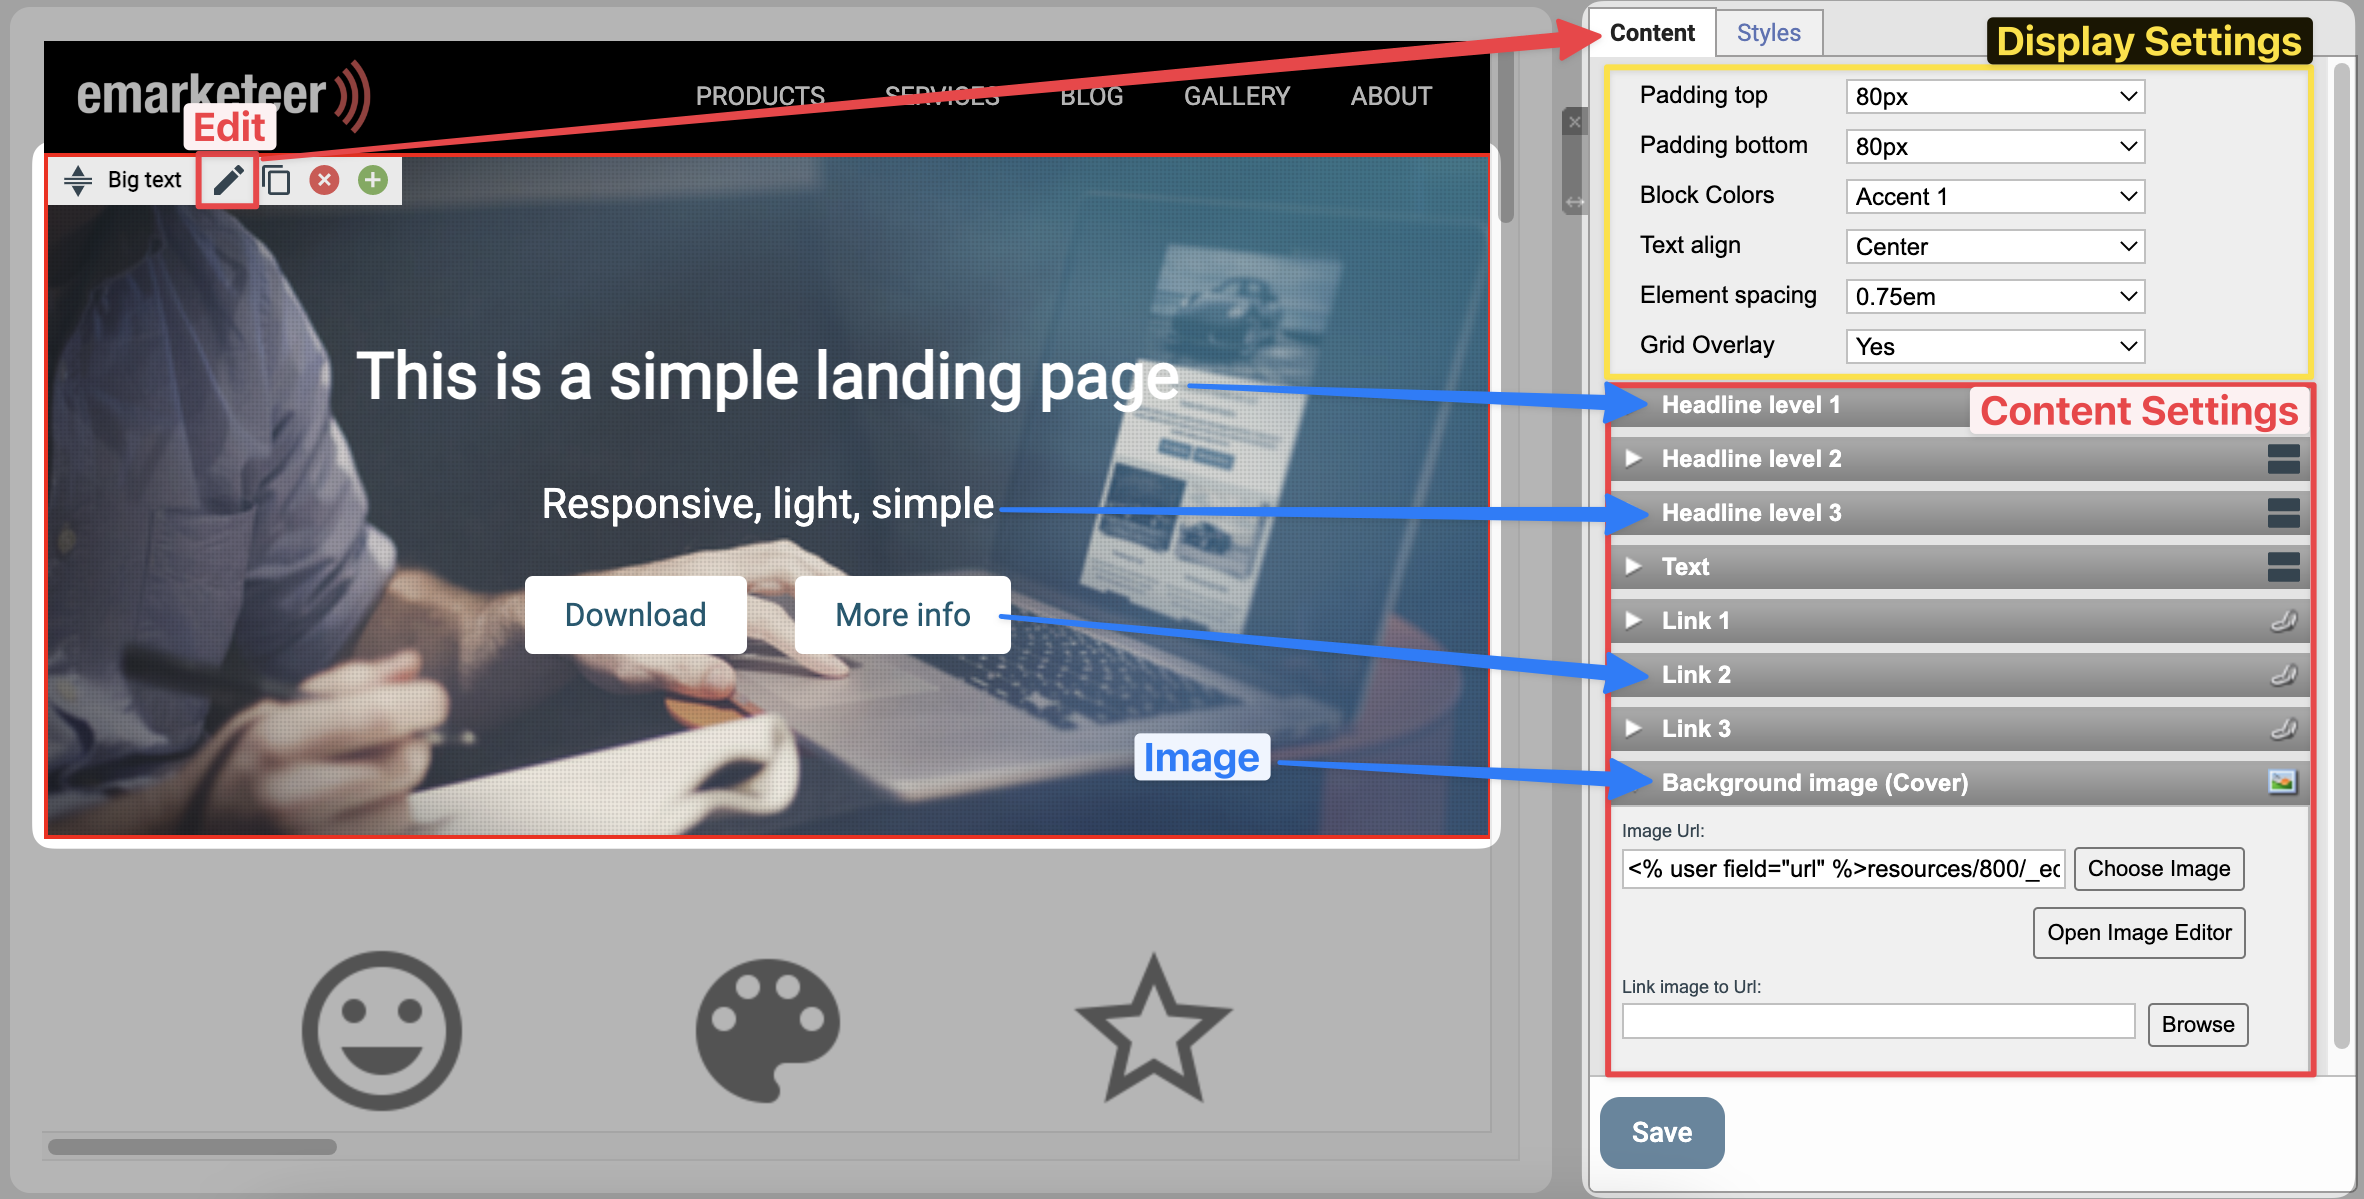
Editing of a webpage content block
When you click the Edit button on a block, a settings menu opens up on the right side of the page.
The menu usually has two tabs, Content and Styles. Content is where you change the Block’s settings and Content, while Styles is where you change the Colors and Font settings.
Focusing on the Content tab there are two sections. First, there are some settings for how the block will be displayed which we will leave as is. The second section is what we will be looking at more as this corresponds to what is shown in the Content Block, such as any images, headlines, text paragraphs, and buttons that you can use in the block.
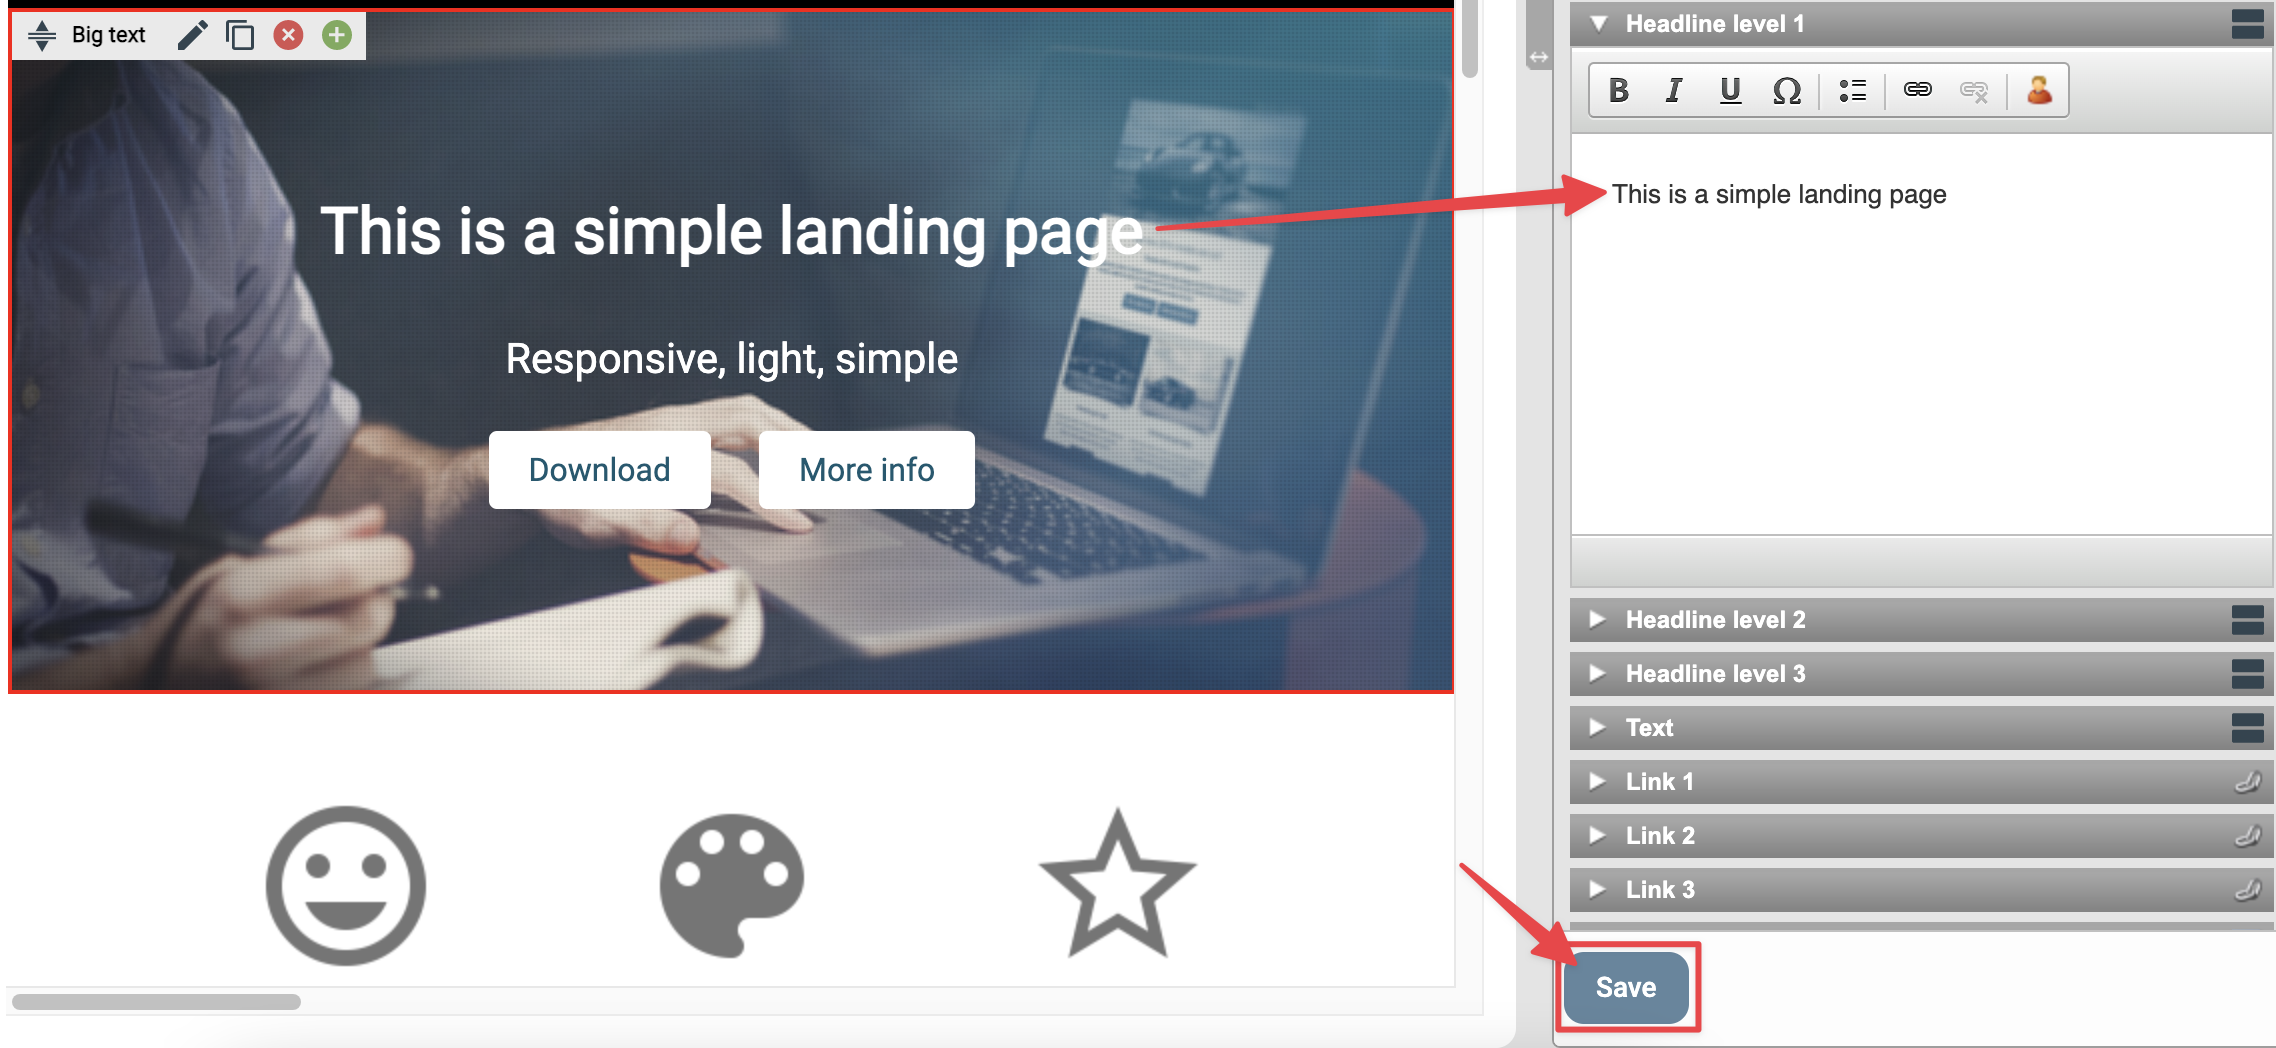
5. Changing the Headline of a Block
To change the text of a Headline or Text paragraph you start by clicking the Title bar for the part you want to change and then edit the text in the text box.
If you leave the text box empty, then that part of the Content Block will be hidden. As an example, in the image below we are not using the text paragraph and two of the link buttons so they are not being shown in the Content of the page.
Remember to click the [Save] button after making a change to the Block’s content to save your work.
Editing the Headline text of a block
6. Changing the Image of a Block
You may want to upload your own images to use in your webpage content and to do so you open the content block for editing, then go to the Image section in the right-side menu and click the [Choose Image] button.
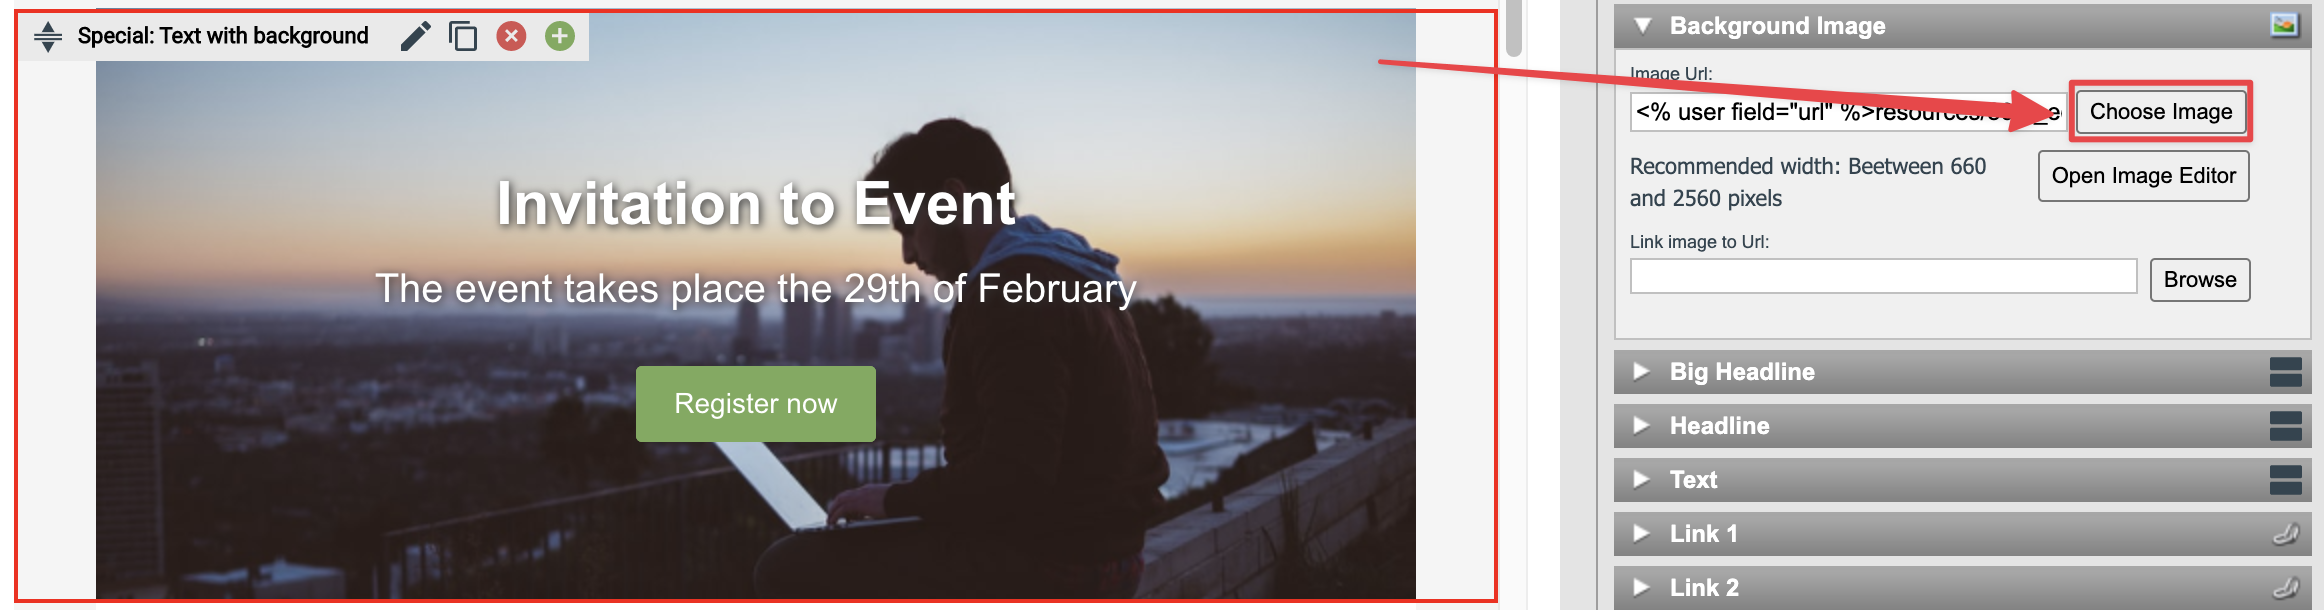
The [Choose Image] button
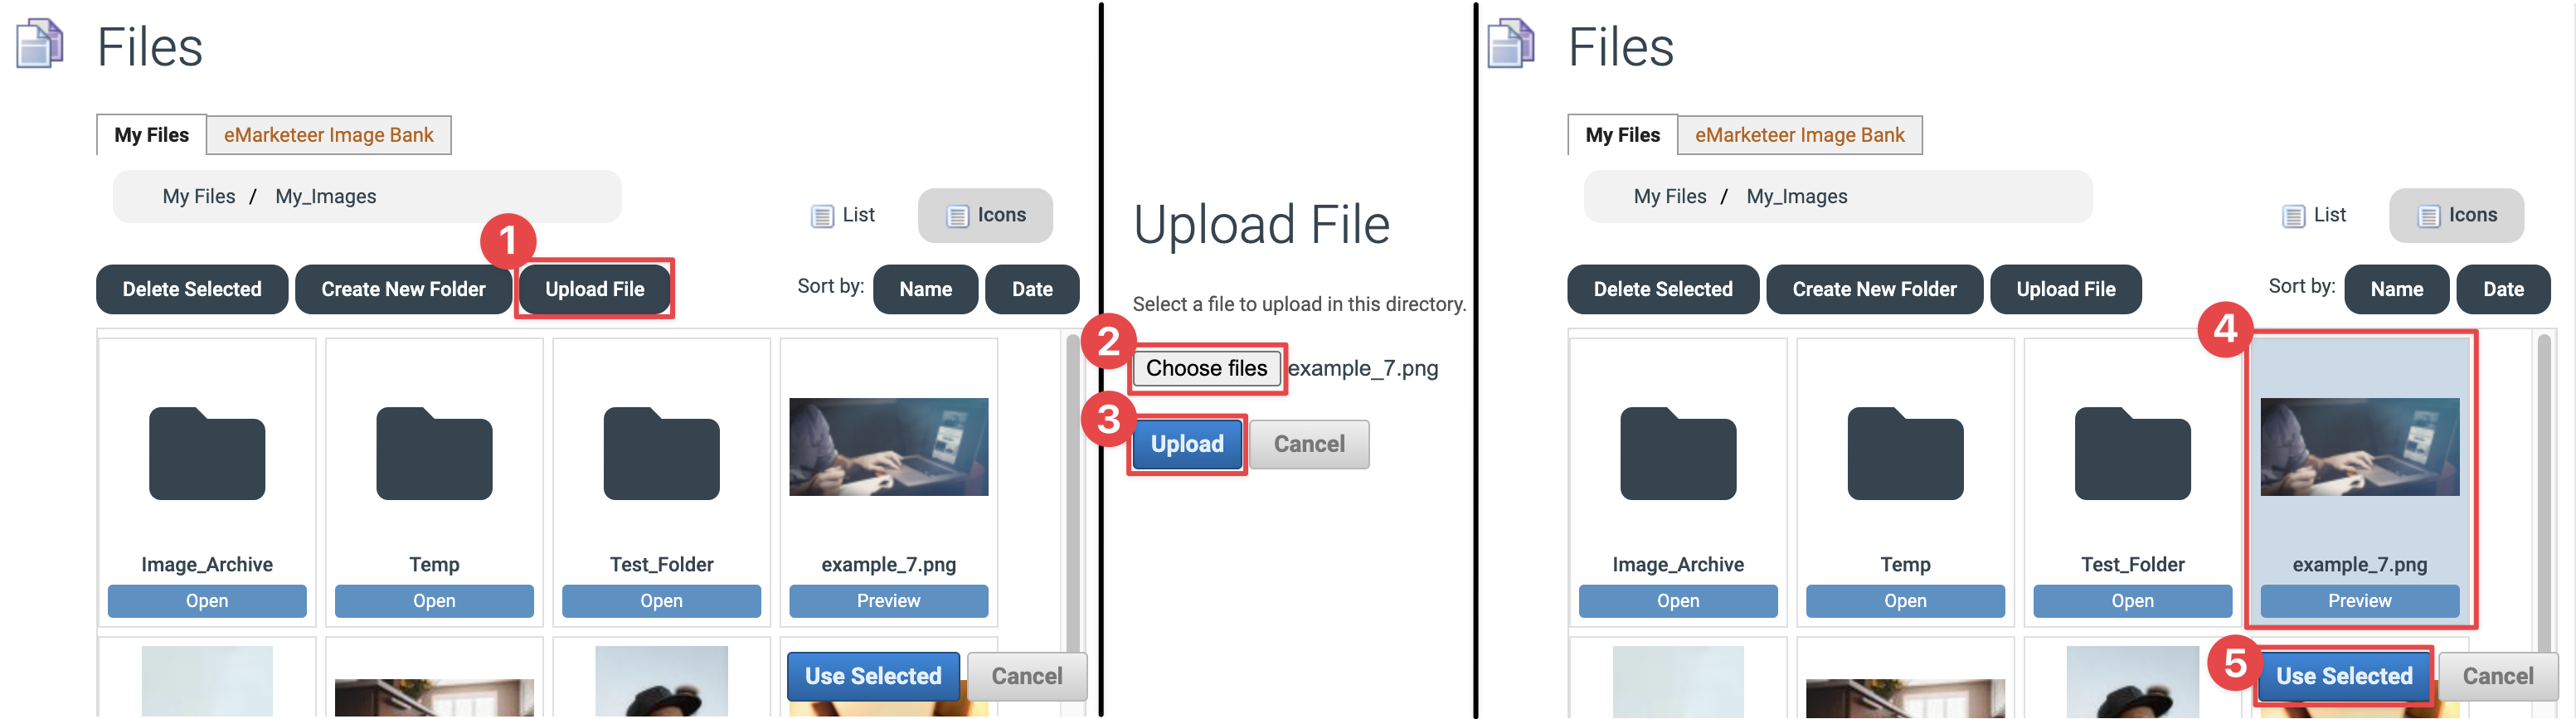
The image below shows the steps for uploading your own image and using it in a content block by following these steps:
1. Click the [Upload File] button.
2. Click the [Choose files] button and select the image file on your computer.
3. Upload the chosen image file to your eMarketeer account.
4. Your file should now show up in the file browser window and you click on it to select it.
5. Click the [Use Selected] button to add it to your content block.
Steps for uploading and using a new image file
If the image file you want to use doesn’t match the recommended dimensions for the content block, then an option to automatically scale the image to fit the content block will appear. To allow the image to be auto scaled you simply click the link in the notice.
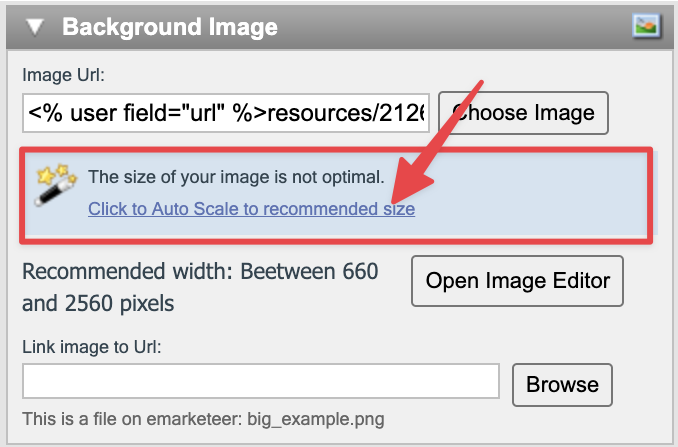
Auto Scale option
7. Adding a Button with a Link
When you want to link to a webpage, file, or another eMarketeer Component you have the option to use buttons. To link to a website you can simply write the website URL in the URL field of the Link settings (the https:// or https:// protocol of the URL must be included) and write an appropriate caption text for the Button that is displayed.
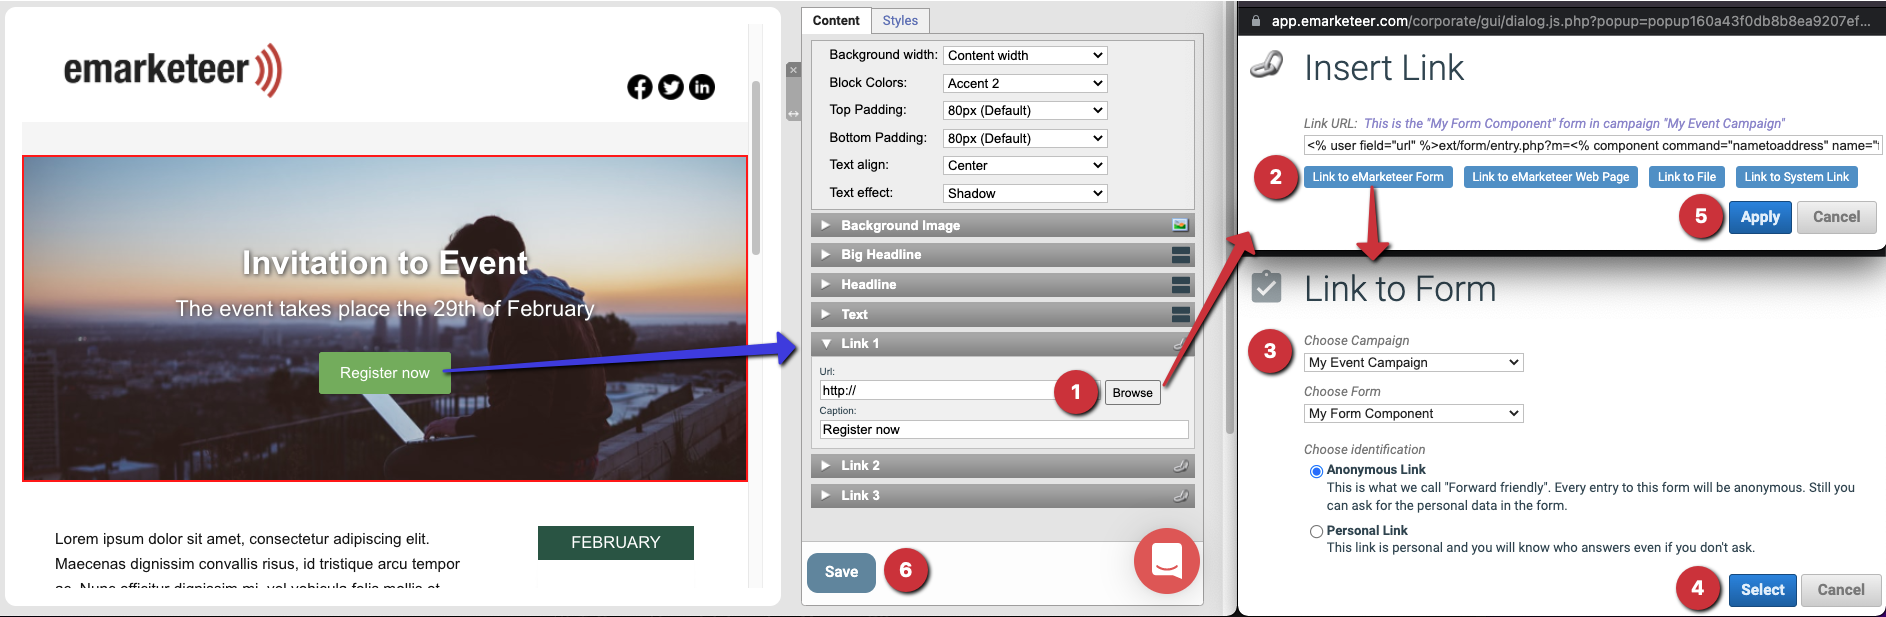
The image below shows the steps for adding a link to a Form by following these steps:
1. Open the “Link 1” content settings and click the [Browse] button.
2. Click the [Link to eMarketeer Form] button.
3. Select the Campaign where your Form is located in the first dropdown menu and then select the Form you want to link to in the second dropdown menu.
4-6. Click [Select], then [Apply], and lastly [Save] to add the link to the button and save the change to the Block.
Update Content Block button link
8. Adding an additional Content Block to the Webpage
If you want to add a new Content Block to the Webpage you start by clicking the [Add Content Block] button in the left-side menu.
Then you click the [Add Block] button that corresponds to the Block you want to add from the Add Content menu that appears on the right side of the page. If the button is grey then you need to first click on an existing content block in the Webpage to select it, this tells the editor where you want the new block to be inserted on the page.
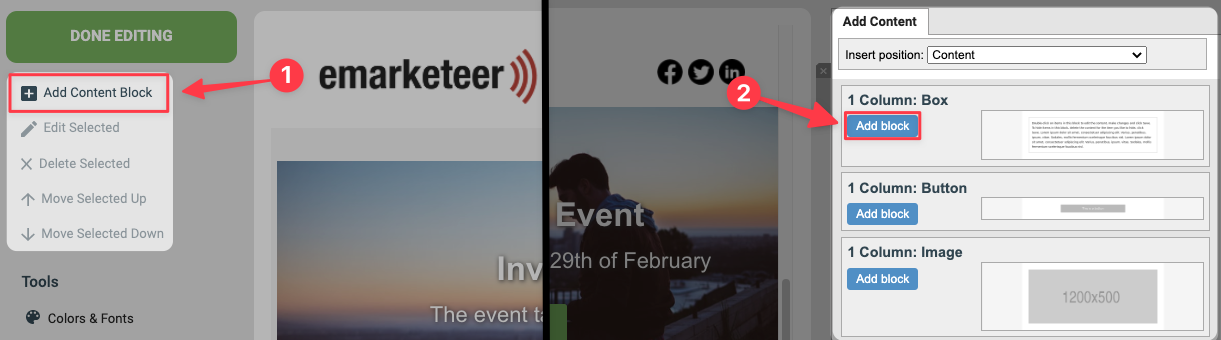
Add Content Block to open the menu and then Add the specific Block you want
9. Repositioning a Content Block in the Webpage Content
When you have added a new Content Block or want to reposition an existing one you click and hold the repositioning icon on the left side of the Block’s context bar and then drag the block to the position where you want it on the page.

Reposition Block in Content by draging it into position
10. Deleting a Content Block from the Webpage
The Template may also have included a Content Block that you do not want on your page and to delete it you click the delete button on that Block’s context bar as shown in the image below.

Delete Content Block button
11. Finishing the Webpage
Click the [Done Editing] button to exit the Webpage editor.

The [Done Editing] button